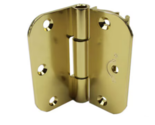
Pella Adjustable Hinge Radius Corner Entry Door - 3.75" by 3.5" - Polished Brass
Offer policy
OBO - Seller accepts offers on this item.
Details
You can make your offer during the checkout process as long as you do not live in a state where marketplace facilitator tax laws exist.
Check your state.
Payment options
PayPal accepted
PayPal Credit accepted
Venmo accepted
PayPal, MasterCard, Visa, Discover, and American Express accepted
Maestro accepted
Amazon Pay accepted
Nuvei accepted
Item traits
| Category: |
Window Hardware
|
| Quantity Available: |
6 in stock
|
| Condition: |
Used
|
| Brand: |
Pella
|
| MPN: |
9040126-PB
|
| Suitable For: |
Casement Window
|
| Finish: |
Brass
|
| Items Included: |
Hardware
|
| Type: |
Operating Handle
|
| Color: |
Brass
|
| Material: |
Brass
|
Listing details
|
Shipping discount:
|
No combined shipping offered
|
|
Posted for sale:
|
May 14
|
|
Item number:
|
1746954534
|
Store
Pella Adjustable Hinge Radius Corner Hinge 3.75" by 3.5" Hinges - Polished Brass
89.95110.50
Description:
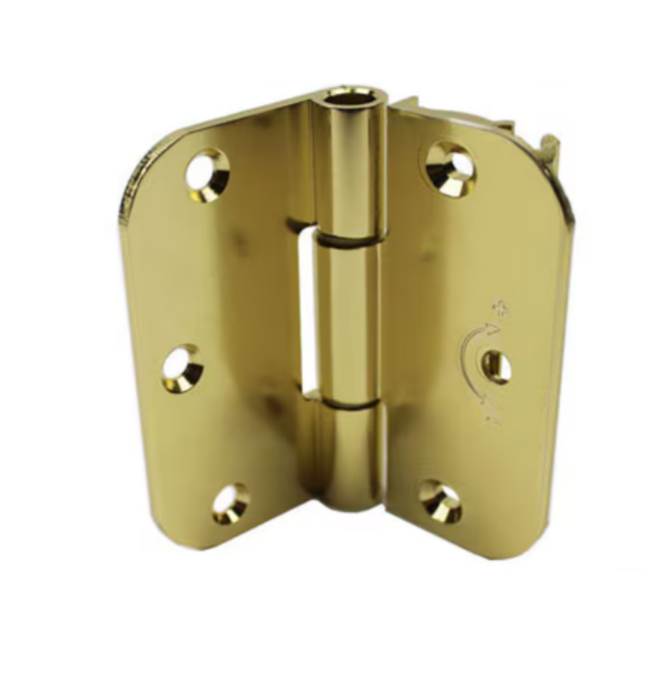
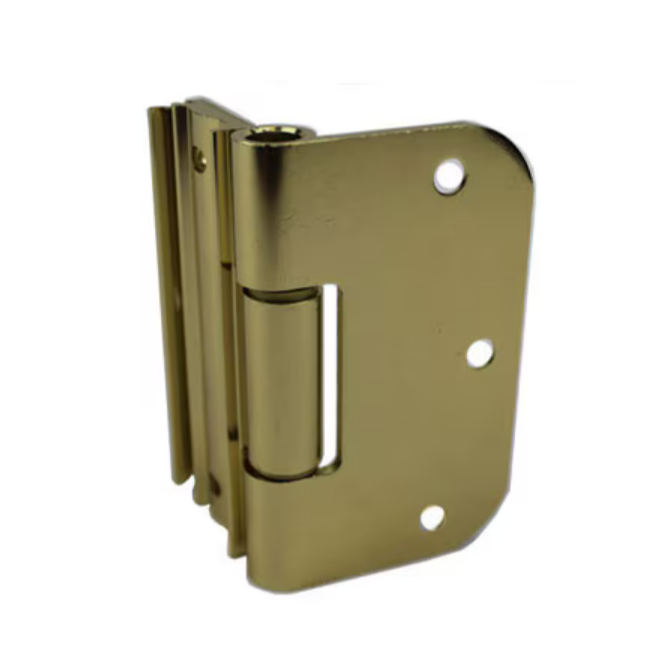
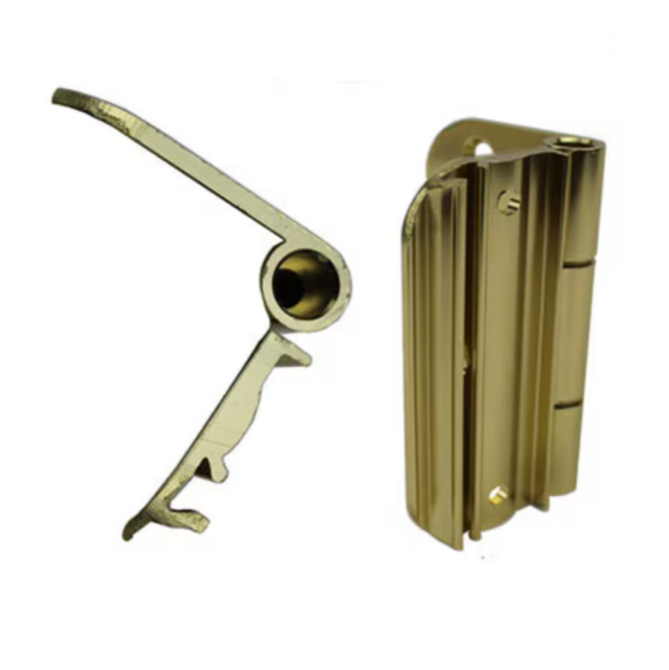
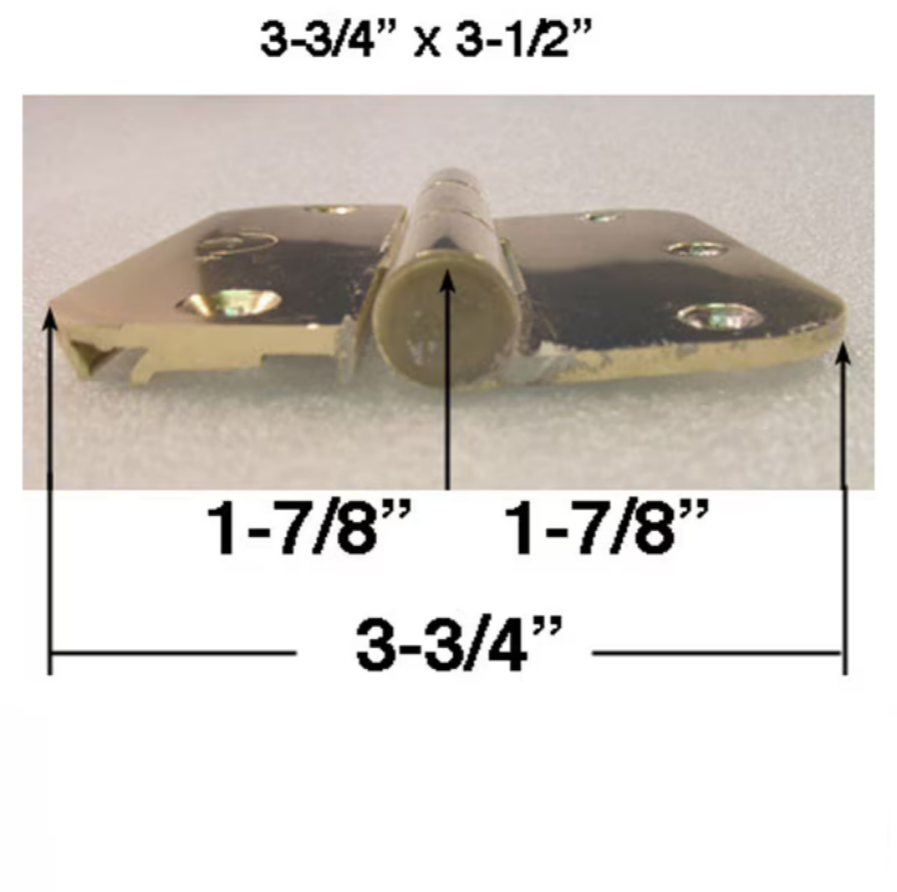
3-3/4 x 3-1/2 Pella Adjustable Hinge 5/8 Radius
Pella AS/D2 Inswing Adjustable Door Hinge / Screw
Overall Width: 3-3/4 inch
Overall Height: 3-1/2 inch
Corner: 5/8 Radius
3-7/8 Leaf Adjustable Hinge is optional on Architect Series and Pella entry doors
Leaf Thickness: 1/8 inch 1/4 inch Adjustable Side
Pella French Door Adjustable Hinges
Check door operation. Open and close the door to check for proper operation.
Make sure the door will latch correctly.
Note: If there are any problems with the operation, check to confirm the door frame is installed plumb, level and square.
If the reveal between the door panel(s) and frame is not even, adjustments may be made:
Doors
without adjustable hinges: Plastic shims located behind the hinges may
be removed to adjust the reveal between the door panel and door frame.
Additional hinge shims may be added if required.
Note:
Doors with adjustable hinges will have a (+)(-) on the door panel hinge
leaf to indicate possible adjustments and doors without adjustable
hinges do not have adjustment indicators.
Adjustable hinges are not designed to make up for failure to install the door frame correctly.
Before adjusting hinges, confirm the door is installed plumb, level and square.
Adjust
the reveal if needed. If the door panels have adjustable hinge leafs.
Use a 1/8? Allen wrench to turn the center screws clockwise (+) to
increase the space between the frame and the door panel. Turn the center
screw counter-clockwise (-) to decrease the space between the frame and
the door panel. DO NOT turn the screws more than a turn in either
direction. In some cases it may be necessary to loosen and then tighten
the top and bottom hinge screws to obtain full hinge adjustment. If
necessary, loosen the top and bottom screws, and immediately re-tighten
them. With the screws tightened, turn the adjustment hinge screw. If the
hinge will not adjust any further then it is adjusted as far as it will
go. If more clearance is needed adjust the shims between the frame and
rough opening. Doors with Adjustable Hinges: 2N
Note:
DO NOT adjust the hinge with the top and bottom screws loose; this
could force the hinge to adjust beyond its design capability which can
cause the hinge to bind, damage the hinge and/or pull out the screws. A
turn of the center screw provides approximately 1/16? adjustment.
Quality
Note: DO NOT use a Ball (rounded) tip Allen
wrench as it will damage the adjustable screw head. Note: For more
information on the adjustable strike latching, go to the Troubleshooting
section at the end of this instruction.
Note: Lights signs of use. No installation screws.
MarkdownHardware.com 2025-26 All Rights Reserved